It’s that time of year – back to school time. Parents are out shopping for school supplies and kids are spending their last days of freedom playing with friends.
I thought I’d share this Back to School Cookie Bouquet I made for my daughter’s teacher:
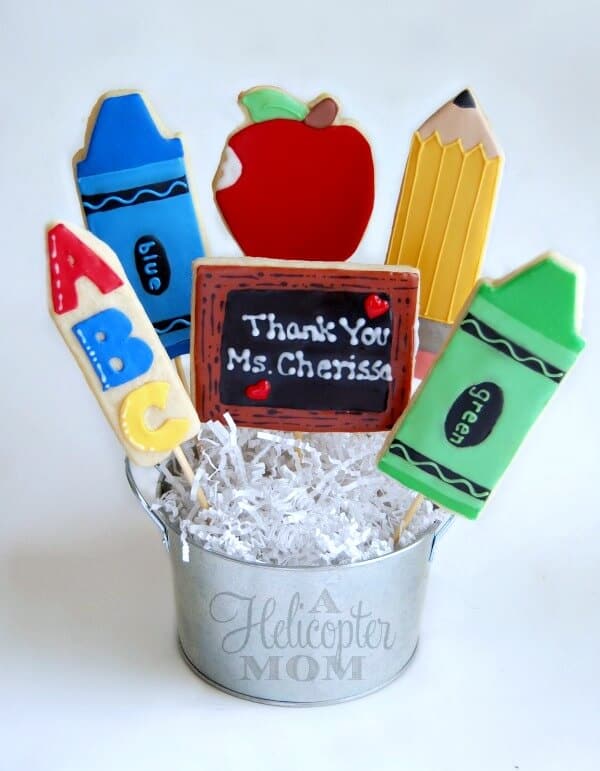
Back to School Cookie Bouquet
Cookie Ingredients
• 6 cups flour
• 3 tsp. baking powder
• 2 cups unsalted butter
• 2 cups sugar (white granulated)
• 2 eggs
• 2 tsp. vanilla extract, almond or desired flavoring
• 1 tsp. salt
Cookie Instructions
- Cream butter and sugar until light and fluffy. Add eggs and vanilla. Mix well. Mix dry ingredients and add a little at a time to butter mixture. Mix until flour is completely incorporated and the dough comes together.
- Chill for 1 to 2 hours
- Roll to desired thickness and cut into desired shapes*. If making cookie pops for a cookie bouquet, add cookie sticks before baking. Make sure cookie dough is thick enough to cover above and below the stick.
- Bake on ungreased baking sheet at 350 degrees F (176 C) for 8 to 10 minutes or until just beginning to turn brown around the edges. This recipe can make up to 5-dozen 3″ cookies.
* For the crayons, pencil and letters, I used this cookie cutter. The apple is this cookie cutter. The chalkboard is just a rectangle I cut with a knife.
Icing Ingredients
• 2 lbs of powedered sugar
• 1/3 cup light Karo corn syrup
• 1-2 TBS of clear vanilla and or clear almond extract (or some of both).
• milk or water to adjust consistency
Icing Instructions
- Mix powdered sugar, corn syrup and flavorings together at a low speed until thoroughly blended without any small pockets of powdered sugar. Do not use high speed or you will end up with bubbles.
- For thicker icing to use for outlining or writing, add additional powdered sugar until you get the desired consistency.
- For thinner icing to fill in designs, add very small amounts of milk or water until you get the consistency you want.
- Can be stored in the refrigerator for a week, but should be room temperature again before using.
Add outline icings with parchment paper cones or icing bags with tiny tips. Outline the design onto your cookie with the thick icing. Use thinner icing to fill in the design by either spooning small amount in and spreading around or using icing bags to squeeze out and spread around.
Here is a little pic showing how I outlined the crayons with thicker icing:

Once the thicker icing was dry, I flooded each space with the same color in thinner icing.
I usually let the cookies dry for 12+ hours before adding final details with the thicker icing (like the yellow stripes up the pencil, the words “blue” and “green”, the wavy lines on the crayons, etc.)
Let dry another 12+ hours before bagging or stacking (sometimes more if extremely humid outside).
That’s it! Have fun making them and be sure to share your photos. 🙂
Have a great school year everyone!

This is really cute making a Back to School Cookies Bouquet that is hand made with love. I like this idea because it shows the different cookies and the colors are very nice. This would be something very nice to make!
I think your back to school cookie bouquet is AWESOME! Very cute teacher’s gift! I wish I was as talented in the baking department.
these are stunning – you are so talented and that was a very thoughtful thing to do! now that it is well into the school year, i think it would also make a wonderful gift for teacher appreciation day.
You are so incredibly talented. There is no way I could ever make anything that is even close to that!